Fixed! Added L1 to the model.
Thanks!
Fixed! Added L1 to the model.
Thanks!

Have you made sure you followed all steps in this guide? Normally, no other steps should be necessary. If other collision types work, but glass doesn't, I could imagine that the crash property wasn't assigned properly either to the collision itself or the right material(s).
Thanks for the resource! I'll check that out. It seems like my problem might be the windows only having L0, as the base model I'm having issues with did not come with LODs and I'm not skilled enough to create them myself.
Keeping open pending resolution verification

- Delete the sides of the box, leaving only the front and back
This may be your issue
Unfortunately, that didn't work. Bullets still pass right through. However, changing the ID to 116 and GTA V options accordingly results in the game recognizing it as a collision model, except for a metal panel rather than glass.
- Delete the sides of the box, leaving only the front and back
This may be your issue
I'll try it again leaving the sides. Thanks!
Hello,
I've been having issues working with window collision models. I have no idea how to create them (excluding flat glass objects like partition glass) and when I try, they never work. Even on a model with previously working window collisions, after I imported it, made some changes (including adding 'Crash' to User-Defined Options), and exported, the window collisions no longer worked.
I follow the following steps to create and set up glass collision models. These steps work perfectly fine for me when I apply them to flat surfaces but fall apart on anything that isn't flat. Along the same lines, I'm wondering how people create the collision object for complex objects.
I'm really confused as to what I'm doing wrong and would greatly appreciate some guidance.
Thanks.

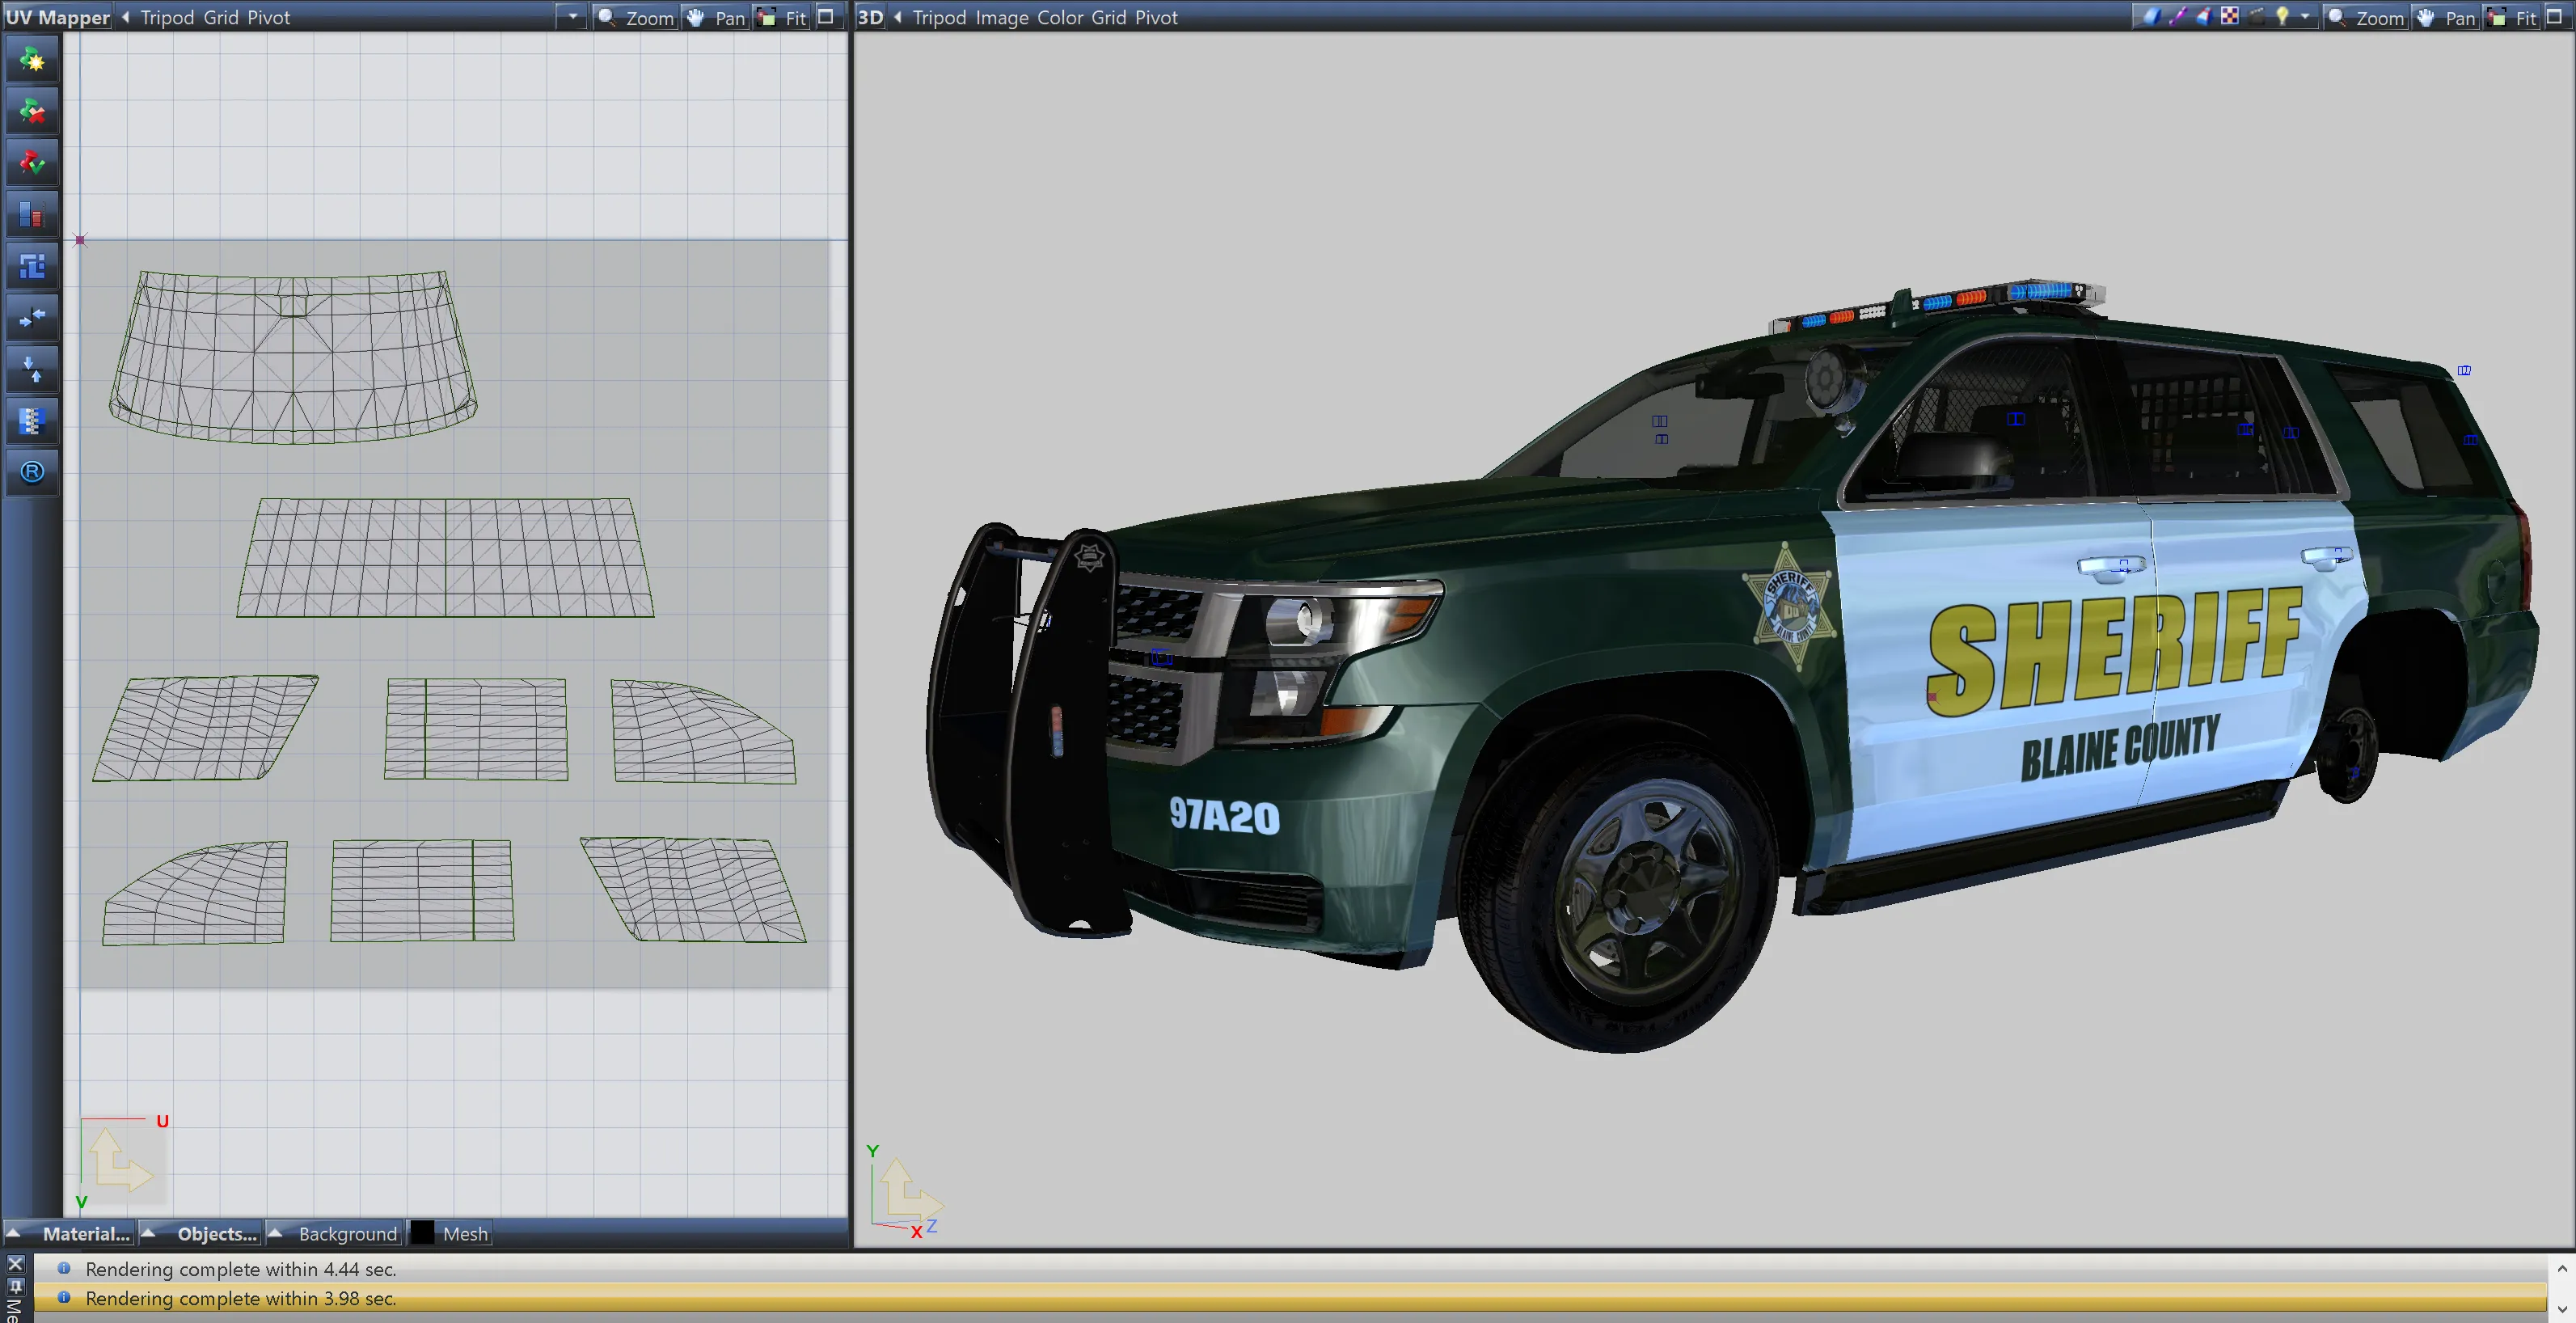
from the pic it looks like the outer is using the vehshare glass instead of the templated inside the material
Yeah that's what I thought too but the outer glass material is set to use tahoe_windows rather than the vehicle_generic_glasswindows texture, and the outer glass is set to the correct material.
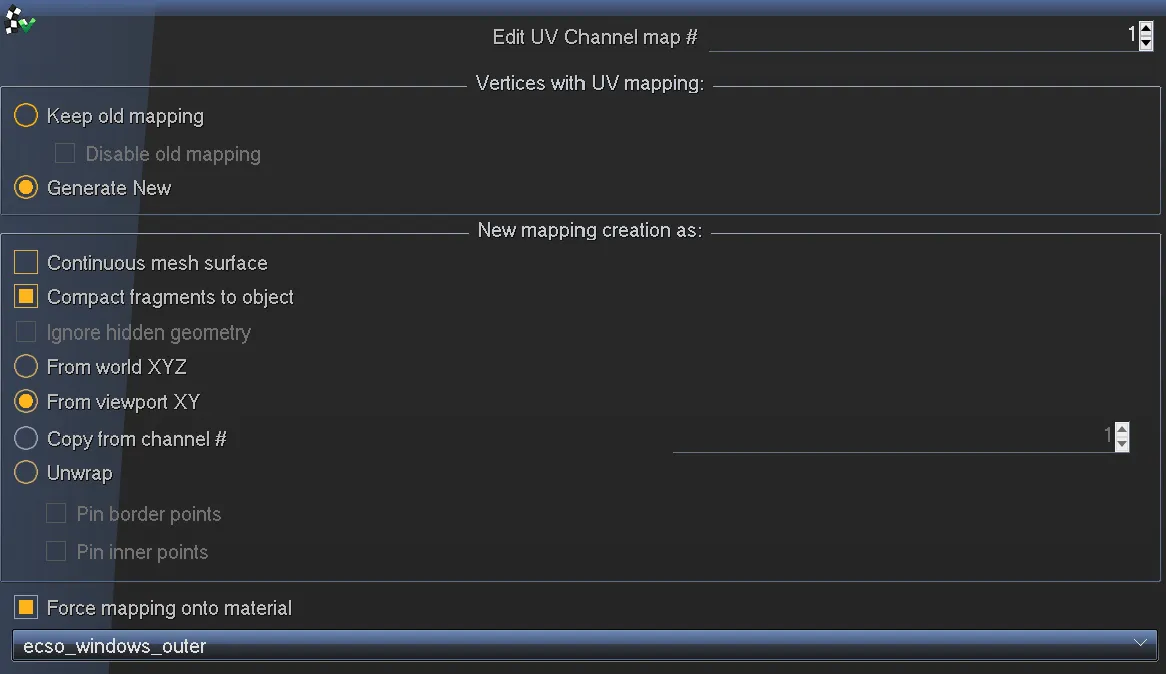
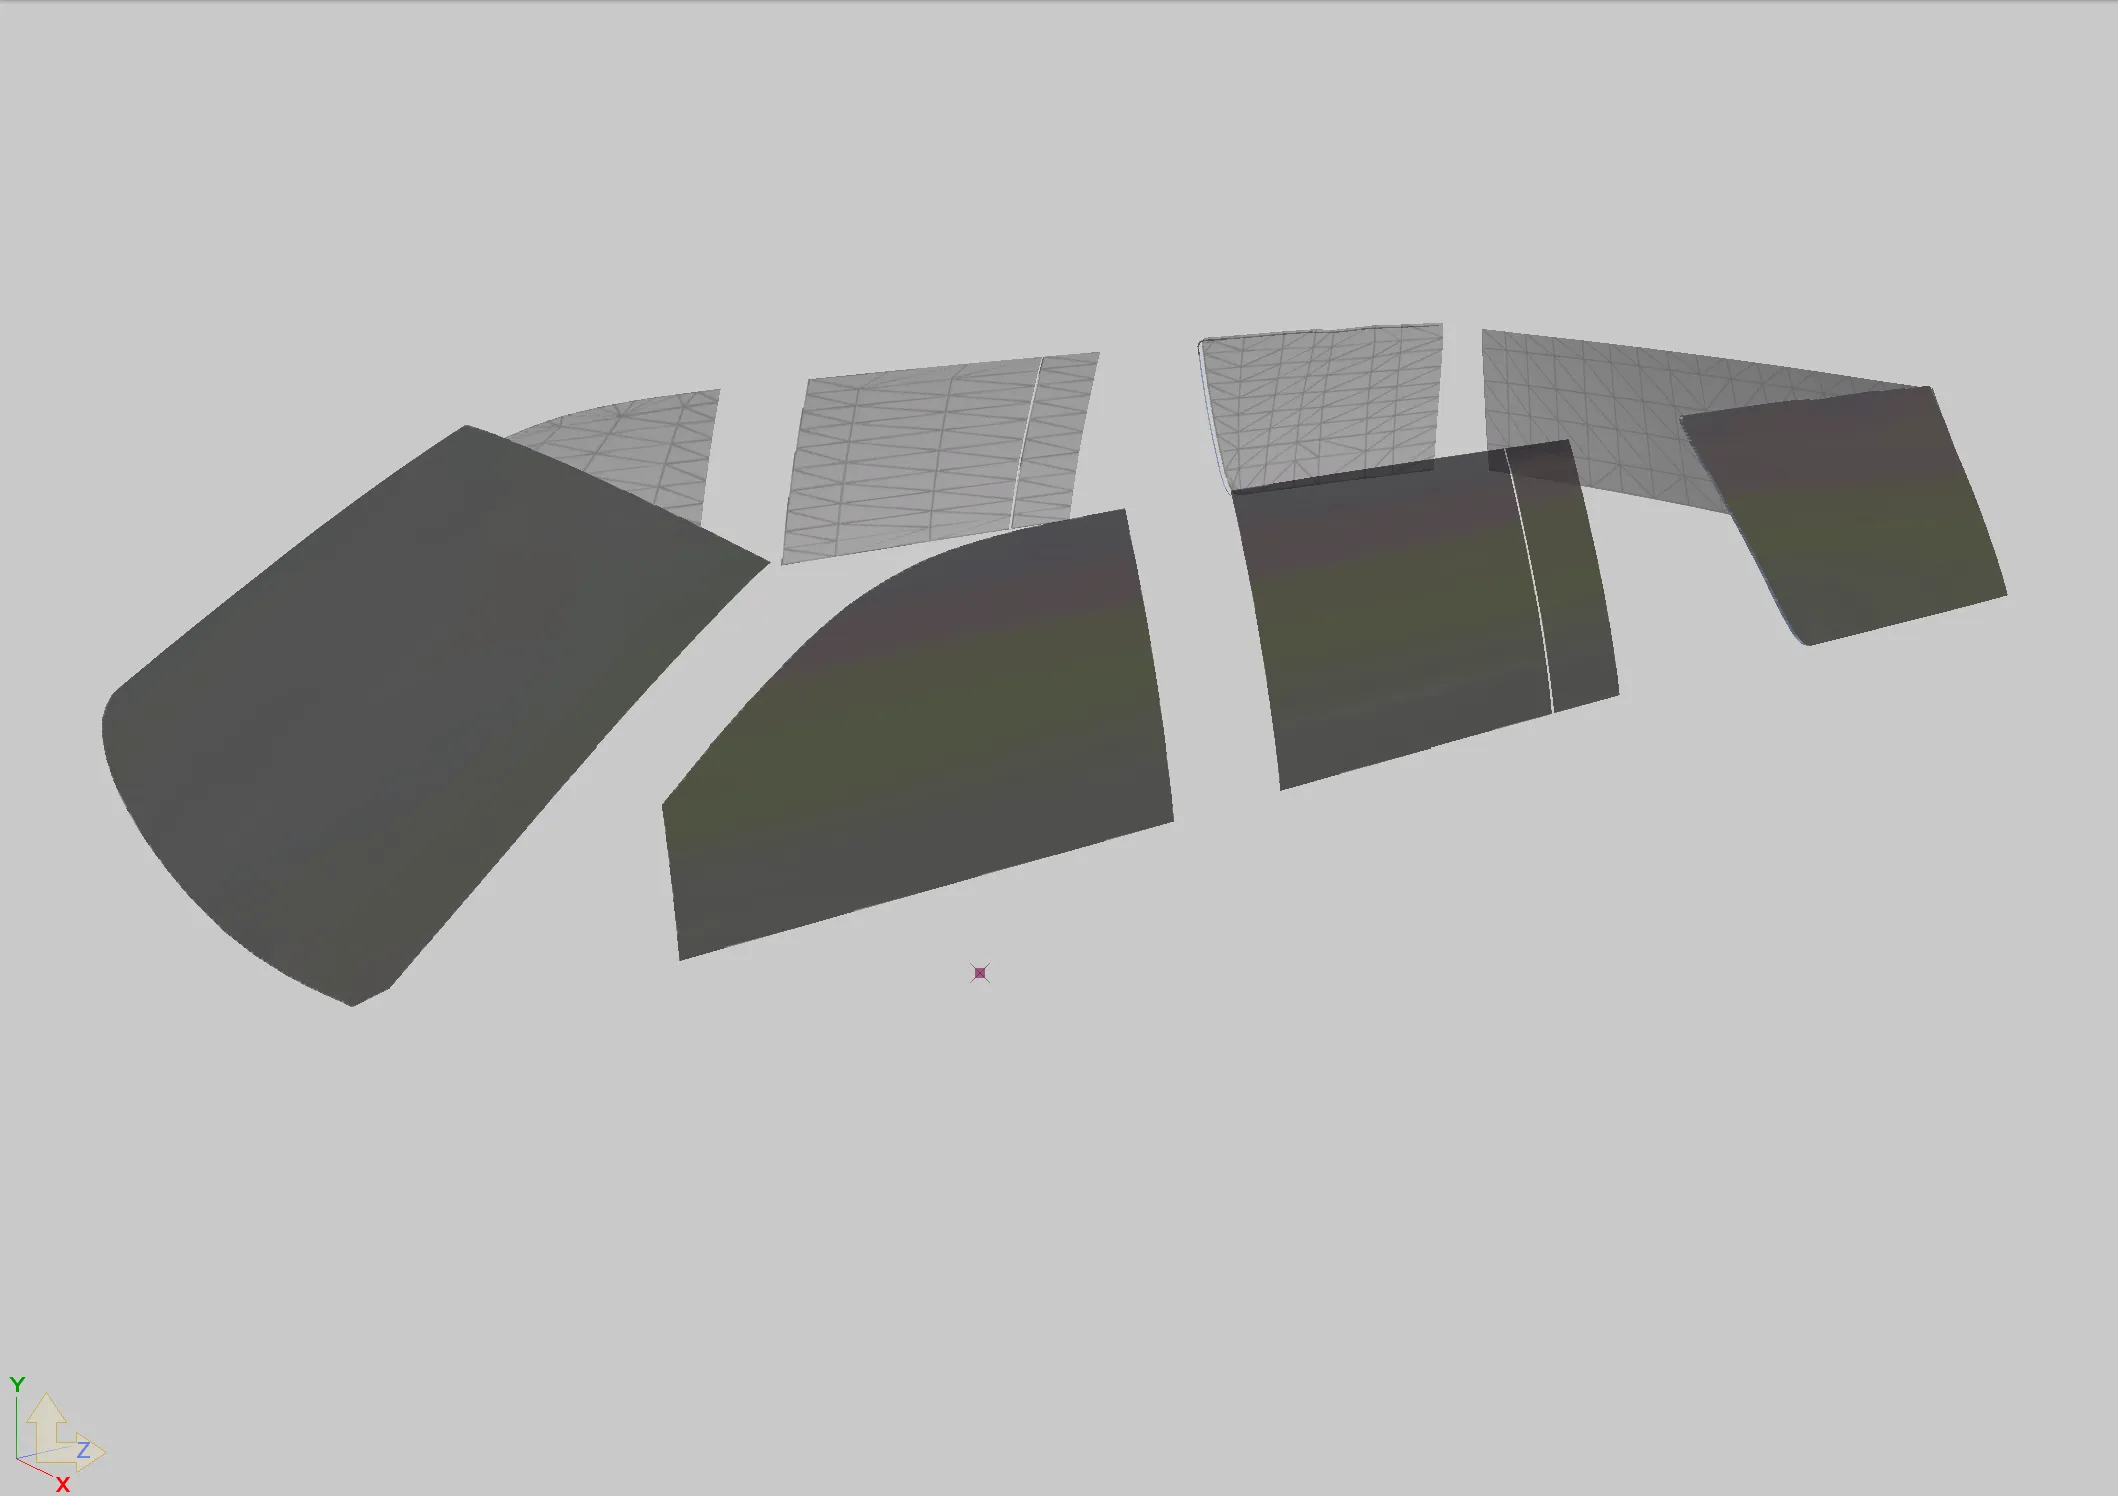
So I need to template the windows of Dan's 2020 Tahoe in order to allow me to add the unit number onto them for my ECSO pack, but I'm running into a problem where only the inner windows get templated and the outer windows don't. For the materials, I have "ecso_windows_outer" and "ecso_windows_inner", with the outer material above the inner and set as vehicle_vehglass and the inner material below the outer and set as vehicle_vehglass_inner (see below image). Oh, and no, I have still not figured out the suspension issue with the LAPD 2014 FPIU... so there's that.

You can see in this image that the outer windows' material thumbnail is different from the inner windows' material, for what reason, I do not know, but I suspect that same reason is also what causes the outer windows to not get templated. When templating the materials, I first templated the outer glass, selecting the outer glass material in polygon mode and then templating them. Following that, I rendered the completed image and then used that to match the inner glass to the outer glass template, using the following UV-map settings (obviously it was changed to ecso_windows_inner for the inner windows) - I also tried with Continuous Mesh Surface and Ignore Hidden Geometry checked, but neither of those options changed anything:
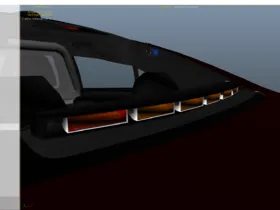
After templating both inner and outer windows, this is what I get in the model viewer:
For reference, I've attached the template I created below. Without decreasing the opacity, the outer windows were 100% black. Decreasing the opacity resulted in the outer windows becoming a transparent shade of black. The below template is with opacity 255 (not made transparent).
I appreciate any replies.

Well I guess the collisions might have something wrong then? Have you converted it yourself? Is anyone else having that issue? Because I can't think of anything else.
I honestly don't know. I didn't convert anything - I just got the base from Insanity, then got the edits from Trooper 18, then changed the front interior to the one from Thero's.
I don't really know what to do at this point. I'll try different handling lines but I don't expect that would fix anything.
RollCentre is like centimetres (or metres) off of the ground, so all those values are too oof for the car, leave it at 0.1 for that car and check it ingame. The rest looks mostly fine, so it should work properly.
It was originally 0.75 for both - I've tried a variety of values, and tested 0.1 for both again in case it worked this time. Changing the values there has no effect on the reversed suspension behavior; it only changes how much the car raises off the ground when accelerating/braking.
 Display More
What exactly did you try modiftying in the handling, too me it looks like it would be an issue with the "VECINERTIAMULTIPLIER" as that is what controls the body roll of a vehicle.
Here is what I found on more about it:
"The way I understand 'vecInertiaMultiplier' to work is that:
x = How your vehicle tilts from side to side (set this low & car will corkscrew easily when jumping)
y = How your vehicle tilts from front to rear (set this low & car will somersault easily when jumping)
z = How the vehicle rotates/turns (ie raising this slightly makes the car slower at turning)"
Original Topic
From that alone I'd try editing the y value and see where that gets you. Thats really the only thing I can think of that would fix it, I don't neccessarily think its anything to do with the model itself.
That wouldn't really change anything in relation to my issue (believe me, I've tried). I've tried to modify the suspension values (CompDamp, ReboundDamp, UpperLimit, LowerLimit). I've not tried modifying the RollBar or RollCenter values as suggested by GreenAid, so I'll be trying that this morning.
That just makes the vehicle rotate slower in those axes, the actual value he needs to lower is RollCentre, provided the COM is in the right place, usually values of 0 or 0.1 are good.
I'll try that now, thanks!
Edit: I'm pretty sure the vehicle center of mass is set correctly, so I haven't changed that from the original (x="0.000000" y="-0.130000" z="0.040000"). For both RollCenter values, I've attempted lowering the values (was 0.75 for both), making the values negative, making the values zero, and making the values an extreme negative OR an extreme positive (which didn't fix anything, but made the reversed suspension effect a LOT more noticable). None of these changes actually fixed anything - should I just try a different handling line or is there something else I should change?
Handling line for reference
<Item type="CHandlingData">
<handlingName>14FPIU</handlingName>
<fMass value="2130.523000" />
<fInitialDragCoeff value="0.910000" />
<fPercentSubmerged value="80.000000" />
<vecCentreOfMassOffset x="0.000000" y="-0.130000" z="0.040000" />
<vecInertiaMultiplier x="1.150000" y="1.000000" z="1.720000" />
<fDriveBiasFront value="0.235000" />
<nInitialDriveGears value="5" />
<fInitialDriveForce value="0.235000" />
<fDriveInertia value="1.000000" />
<fClutchChangeRateScaleUpShift value="2.900000" />
<fClutchChangeRateScaleDownShift value="3.300000" />
<fInitialDriveMaxFlatVel value="150.000000" />
<fBrakeForce value="0.250000" />
<fBrakeBiasFront value="0.461950" />
<fHandBrakeForce value="0.750000" />
<fSteeringLock value="37.000000" />
<fTractionCurveMax value="1.450000" />
<fTractionCurveMin value="1.240000" />
<fTractionCurveLateral value="16.500000" />
<fTractionSpringDeltaMax value="0.134000" />
<fLowSpeedTractionLossMult value="0.190000" />
<fCamberStiffnesss value="0.000000" />
<fTractionBiasFront value="0.479400" />
<fTractionLossMult value="0.980000" />
<fSuspensionForce value="2.090000" />
<fSuspensionCompDamp value="1.550000" />
<fSuspensionReboundDamp value="0.430000" />
<fSuspensionUpperLimit value="0.145000" />
<fSuspensionLowerLimit value="-0.161000" />
<fSuspensionRaise value="-0.007000" />
<fSuspensionBiasFront value="0.472000" />
<fAntiRollBarForce value="0.000000" />
<fAntiRollBarBiasFront value="0.500000" />
<fRollCentreHeightFront value="1.500000" /> <!-- Originally was 0.75, then positive 0.1, then negative 0.1 -->
<fRollCentreHeightRear value="1.500000" /> <!-- Originally was 0.75, then positive 0.1, then negative 0.1 -->
<fCollisionDamageMult value="0.000000" />
<fWeaponDamageMult value="0.000000" />
<fDeformationDamageMult value="1.700000" />
<fEngineDamageMult value="0.000000" />
<fPetrolTankVolume value="65.000000" />
<fOilVolume value="5.500000" />
<fSeatOffsetDistX value="0.000000" />
<fSeatOffsetDistY value="0.000000" />
<fSeatOffsetDistZ value="0.000000" />
<nMonetaryValue value="50000" />
<strModelFlags>440010</strModelFlags>
<strHandlingFlags>820100</strHandlingFlags>
<strDamageFlags>0</strDamageFlags>
<AIHandling>AVERAGE</AIHandling>
<SubHandlingData>
<Item type="CCarHandlingData">
<fBackEndPopUpCarImpulseMult value="0.060000" />
<fBackEndPopUpBuildingImpulseMult value="0.030000" />
<fBackEndPopUpMaxDeltaSpeed value="0.500000" />
</Item>
<Item type="NULL" />
<Item type="NULL" />
</SubHandlingData>
</Item>
Oh my god I fixed it myself
Absolutely ZERO idea why this handling line works, but it's the one I used for the Tahoe and Expedition. The original one I used that caused the reversed suspension behavior was the Gresley-based one.
Handling line I used:
<Item type="CHandlingData">
<handlingName>14FPIU</handlingName>
<fMass value="2130.024000" />
<fInitialDragCoeff value="1.400000" />
<fPercentSubmerged value="85.000000" />
<vecCentreOfMassOffset x="0.000000" y="0.065000" z="0.050000" />
<vecInertiaMultiplier x="1.000000" y="1.090000" z="1.210000" />
<fDriveBiasFront value="0.270000" />
<nInitialDriveGears value="6" />
<fInitialDriveForce value="0.188000" />
<fDriveInertia value="0.800000" />
<fClutchChangeRateScaleUpShift value="2.900000" />
<fClutchChangeRateScaleDownShift value="3.300000" />
<fInitialDriveMaxFlatVel value="140.000000" />
<fBrakeForce value="0.250000" />
<fBrakeBiasFront value="0.602800" />
<fHandBrakeForce value="0.600000" />
<fSteeringLock value="37.000000" />
<fTractionCurveMax value="1.450000" />
<fTractionCurveMin value="1.240000" />
<fTractionCurveLateral value="16.500000" />
<fTractionSpringDeltaMax value="0.130000" />
<fLowSpeedTractionLossMult value="0.400000" />
<fCamberStiffnesss value="0.000000" />
<fTractionBiasFront value="0.483900" />
<fTractionLossMult value="0.870000" />
<fSuspensionForce value="2.000000" />
<fSuspensionCompDamp value="1.650000" />
<fSuspensionReboundDamp value="0.400000" />
<fSuspensionUpperLimit value="0.140000" />
<fSuspensionLowerLimit value="-0.122000" />
<fSuspensionRaise value="0.000000" />
<fSuspensionBiasFront value="0.530000" />
<fAntiRollBarForce value="0.090000" />
<fAntiRollBarBiasFront value="0.530000" />
<fRollCentreHeightFront value="0.210000" />
<fRollCentreHeightRear value="0.200000" />
<fCollisionDamageMult value="0.000000" />
<fWeaponDamageMult value="0.000000" />
<fDeformationDamageMult value="1.700000" />
<fEngineDamageMult value="0.000000" />
<fPetrolTankVolume value="65.000000" />
<fOilVolume value="5.000000" />
<fSeatOffsetDistX value="0.100000" />
<fSeatOffsetDistY value="0.000000" />
<fSeatOffsetDistZ value="0.000000" />
<nMonetaryValue value="50000" />
<strModelFlags>440010</strModelFlags>
<strHandlingFlags>820100</strHandlingFlags>
<strDamageFlags>0</strDamageFlags>
<AIHandling>AVERAGE</AIHandling>
<SubHandlingData>
<Item type="CCarHandlingData">
<fBackEndPopUpCarImpulseMult value="0.100000" />
<fBackEndPopUpBuildingImpulseMult value="0.030000" />
<fBackEndPopUpMaxDeltaSpeed value="0.600000" />
</Item>
<Item type="NULL" />
<Item type="NULL" />
</SubHandlingData>
</Item>
Issue resolved, thank you ZaygTheRard!
14 is way too big. Anything over 10 is way too big. Anything over 8 but less than 10 is passable but not ideal.
Compression isn't your issue, given that I didn't even touch the compression and still managed to get your YTD down from 17 MB to 6.6 MB. It's the random duplicates of textures, 4K resolution on a texture for a gun, a 4K dirtmap, a 4K image for literally just a rifle reticle, vehshare textures, a bunch of 2K images for a radar, etc.
Like I mentioned it's the YFT at this point that's likely causing it. At least from what I saw your _hi.yft which is just L0 is literally 10+ MB. Your L1-L4 YFT is also just a direct copy of the L0... so that's where your crash is. The huge model files.

Before you render the template in ZMod, make sure everything that's everything is on inside the hierarchy that corresponds with the template. I've had that issue before and some of my parts were shut off, so I checked the parts that corresponded with the template and rendered the template once again.
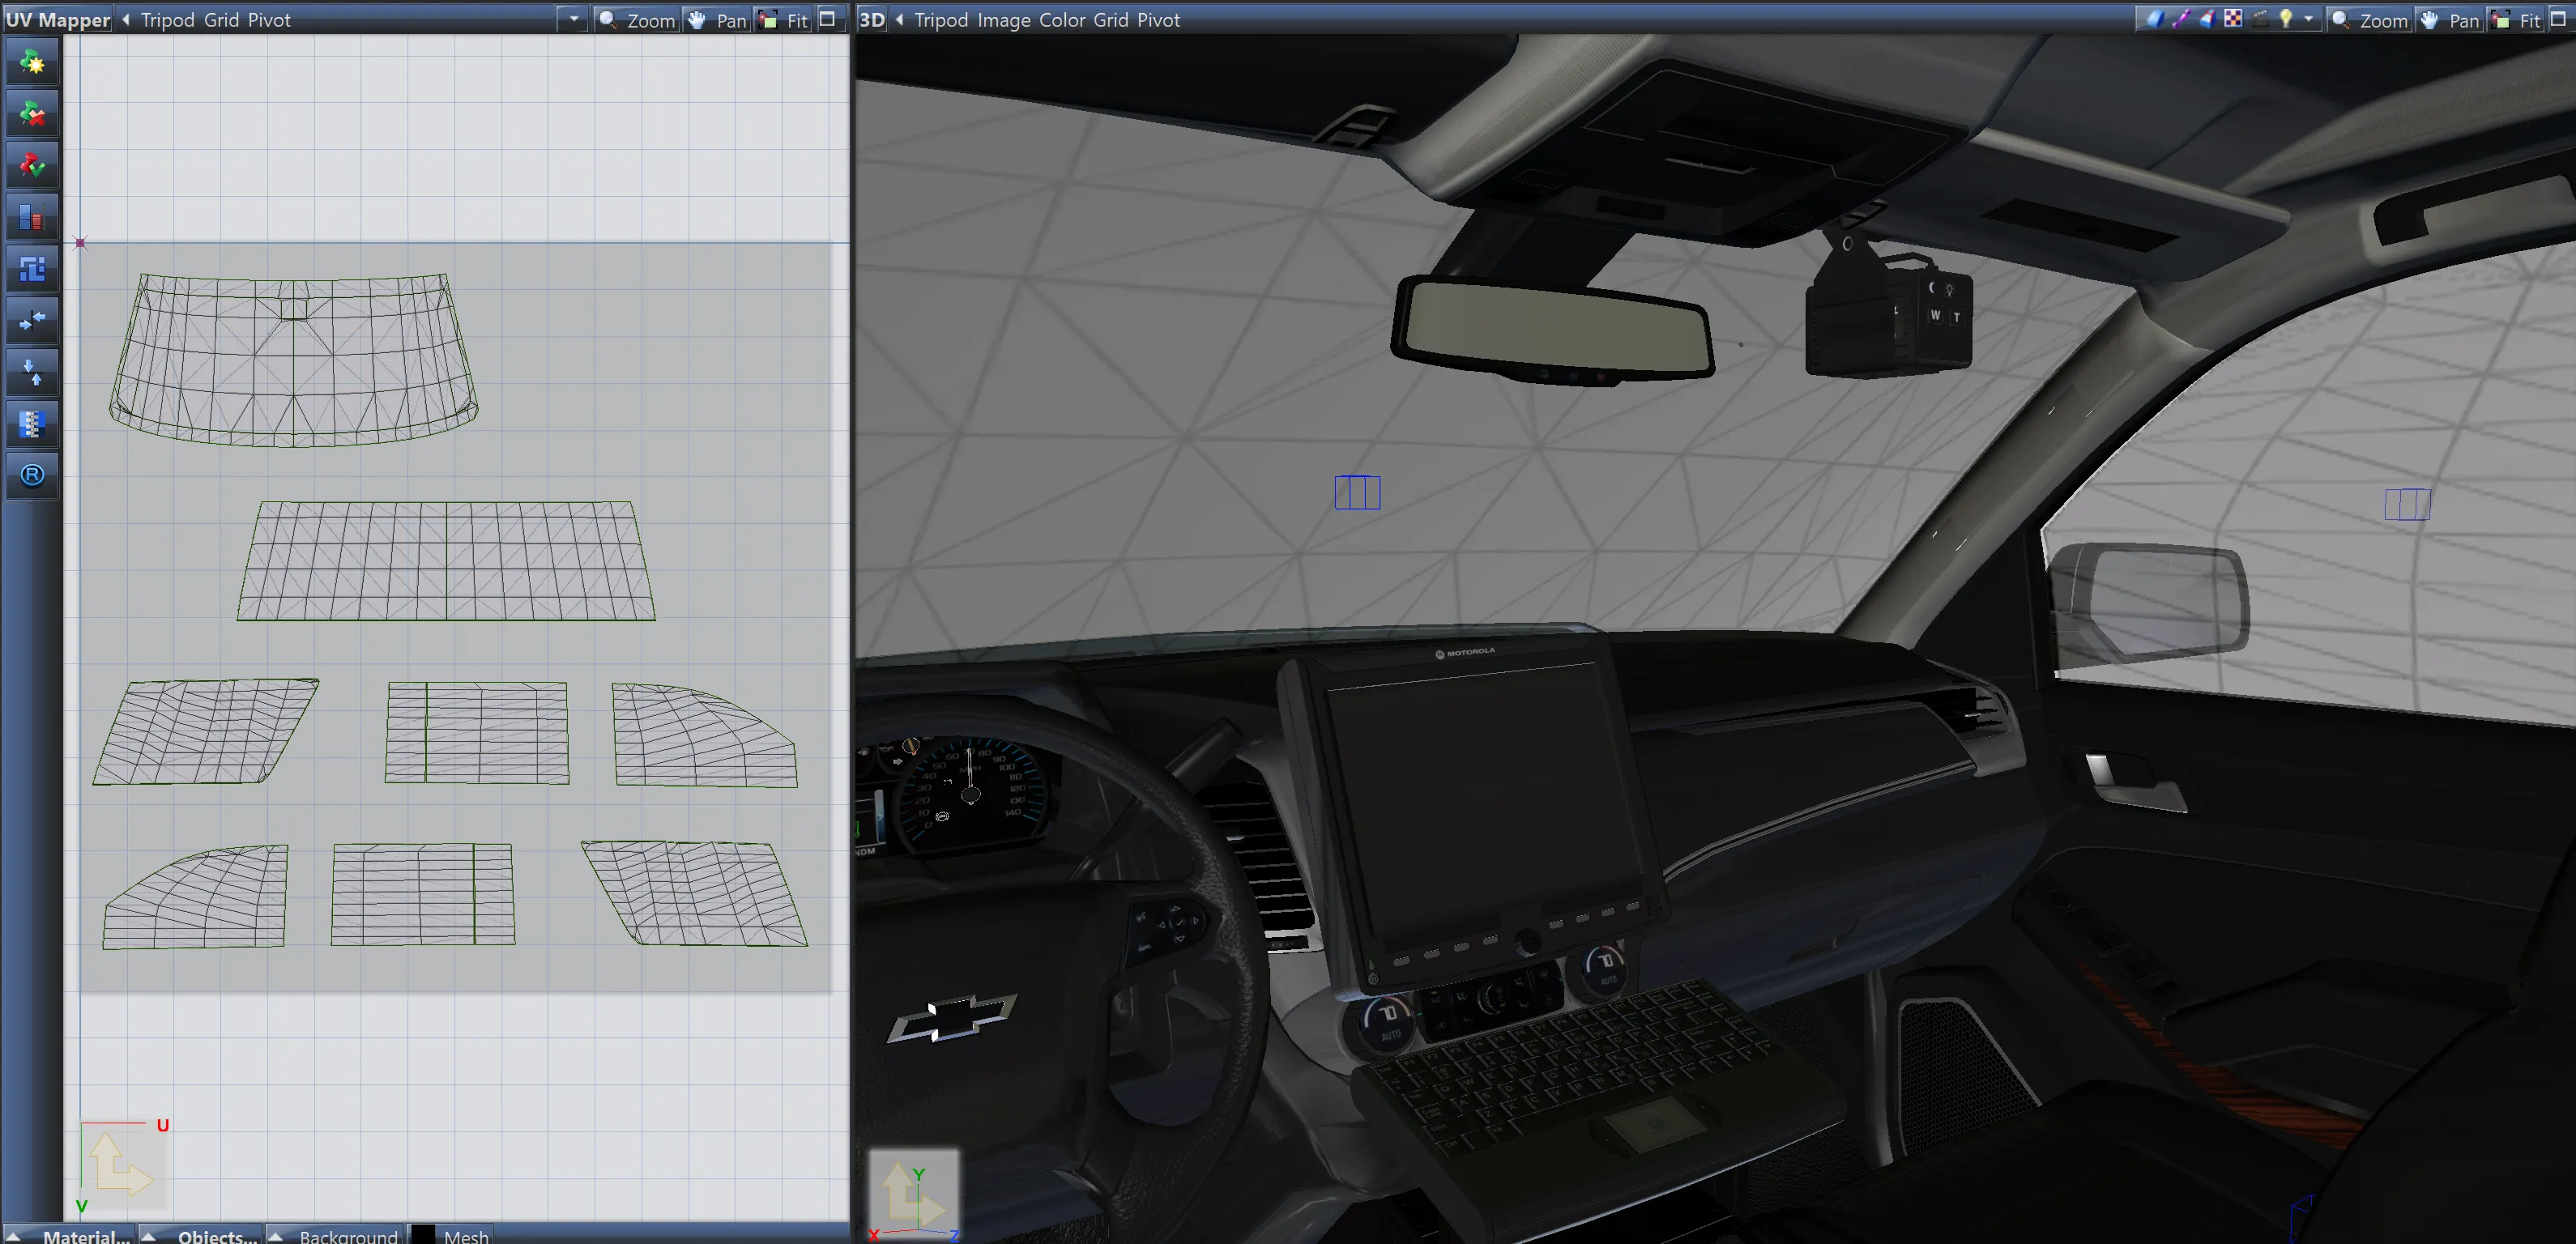
I tried hiding and showing the objects, that did absolutely nothing. I tried hiding and showing the objects within the UV mapper, all that did was remove the hood, roof, trunk, and plates from the template and forced me to re-map those parts.
After that I don't know what I did now but now nothing on the template can be selected, there's no objects in the objects dropdown in the UV mapper, I can't get the template off the UV mapper, and clicking on its material in the dropdown crashes zmod. I swear this program was designed by drunken monkeys.
After switching the UV mapper to a different view everything's gone, is there a way to recover the UV maps without having to individually select each polygon again?
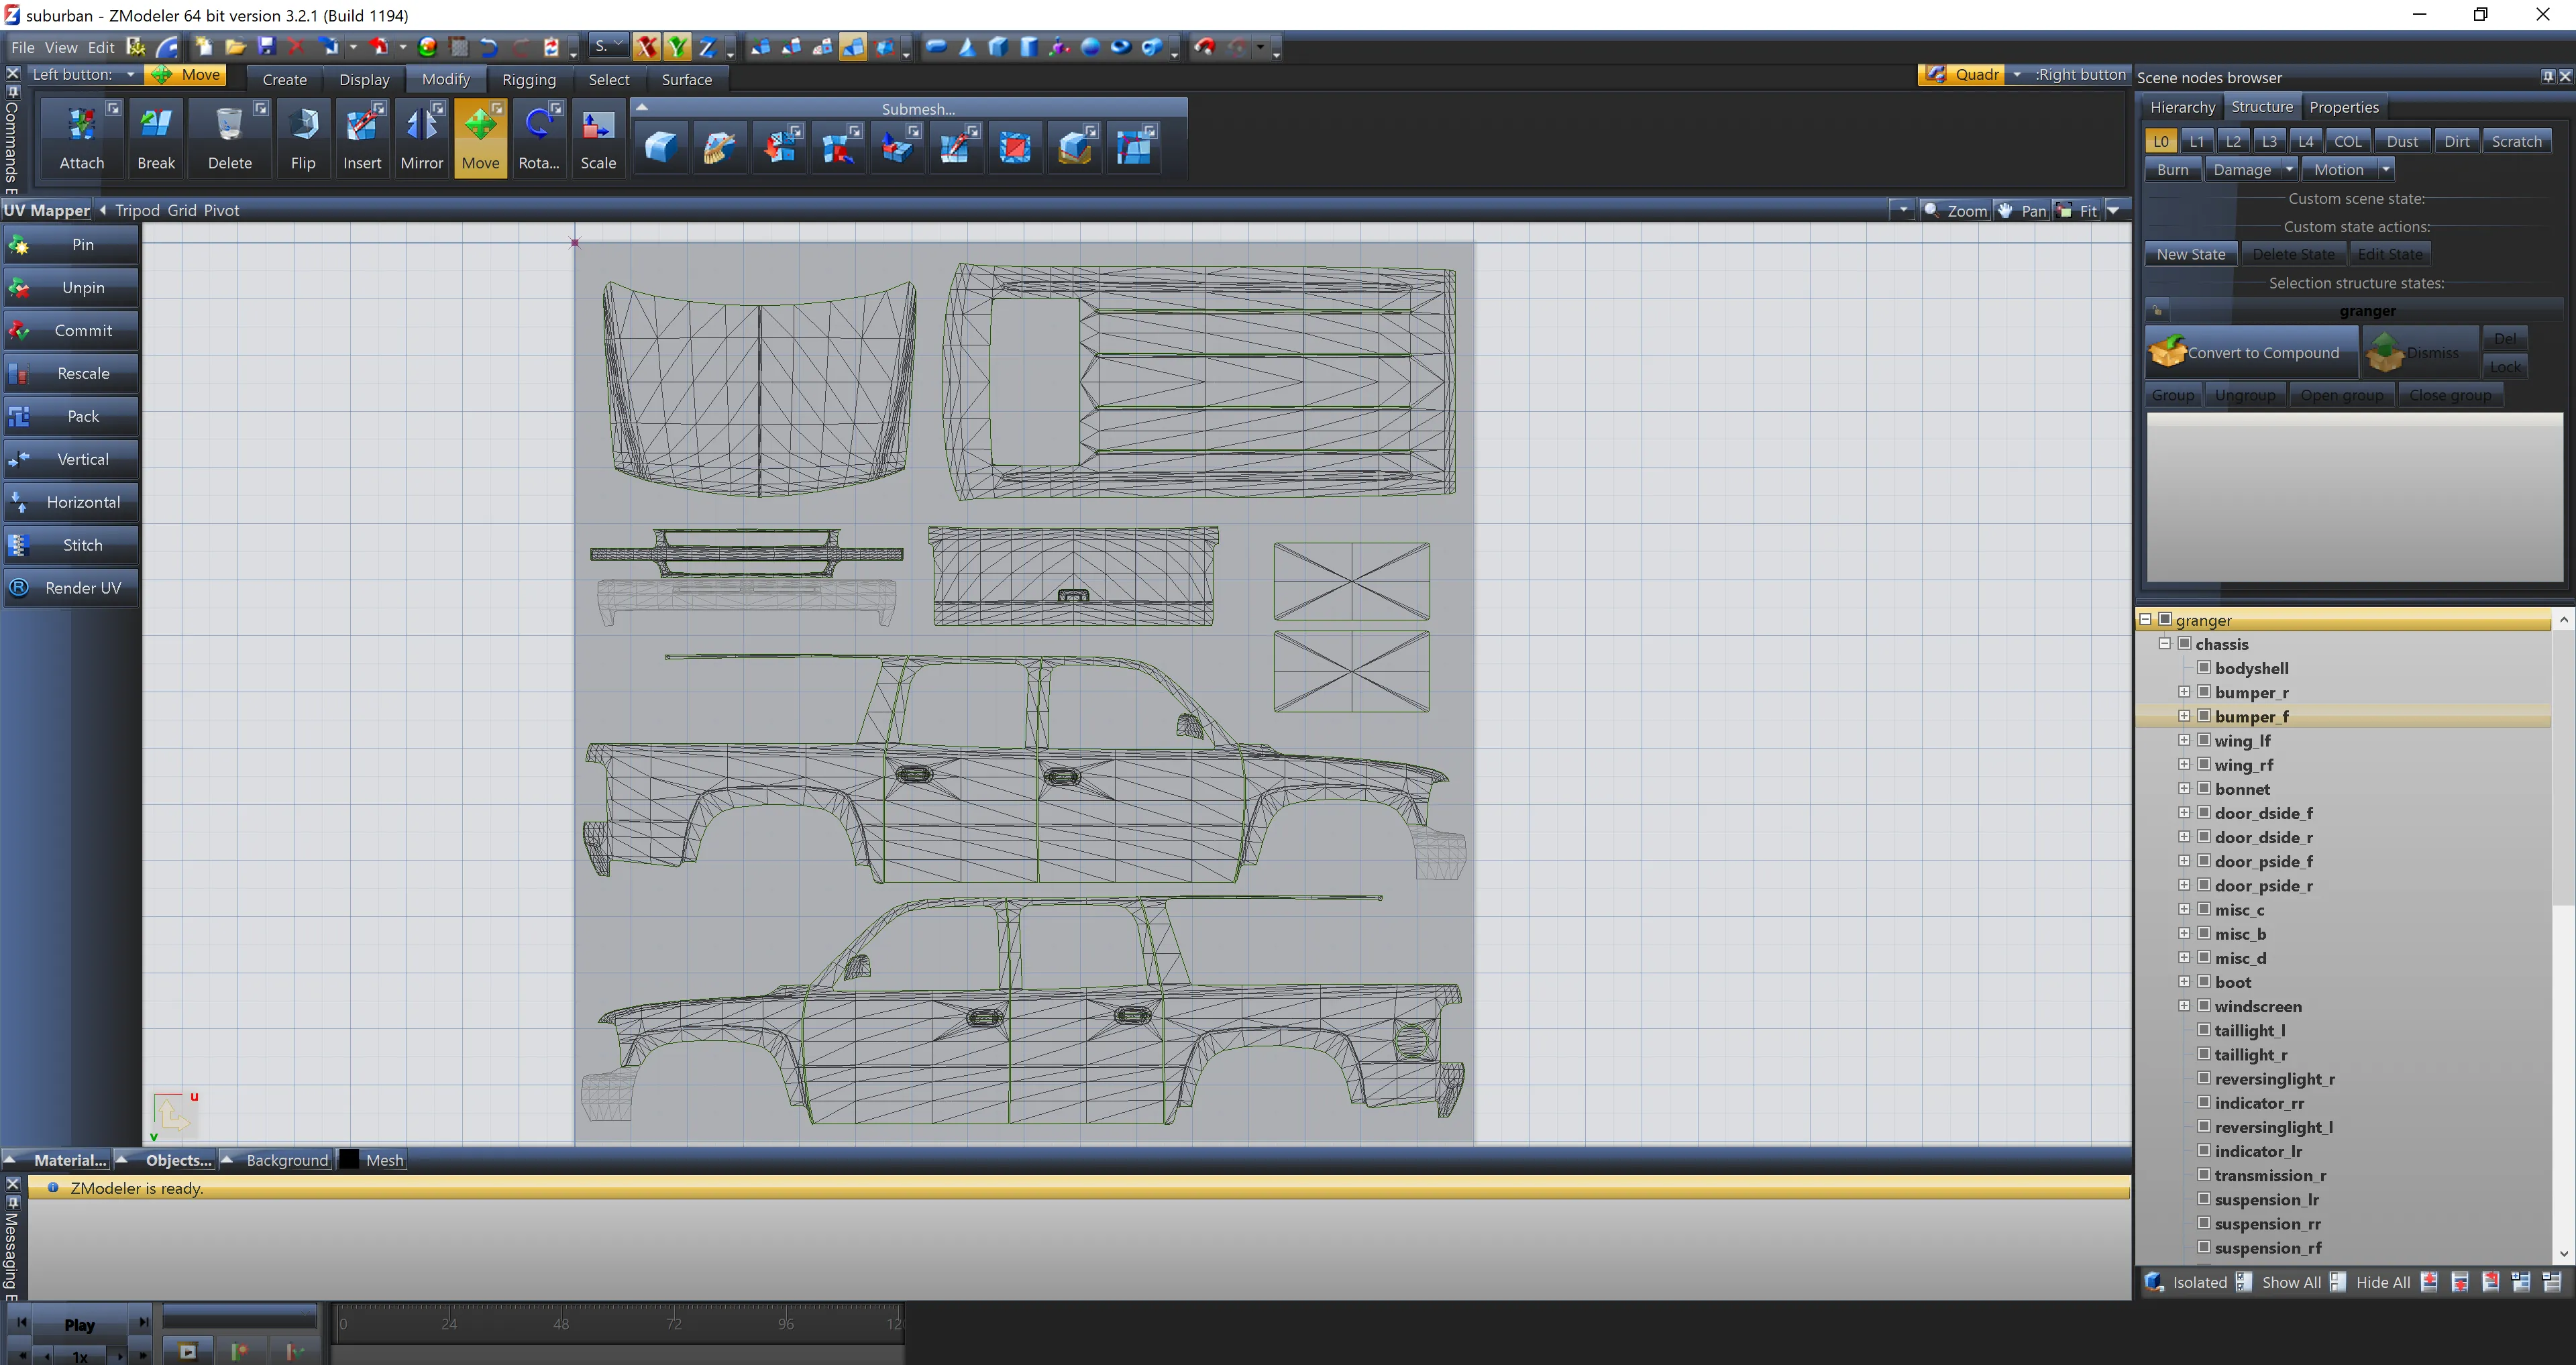
Just like the title says, after creating a template for an '02 Suburban, some areas of the template, specifically any parts from the front bumper, are grayed out and cannot be selected or manipulated in any way. They also don't appear in the render nor export with the template. The only workaround I've found so far is to retemplate those areas but that's a lot of work that I don't really want to do. Am I just doing something horribly wrong as I'm very new to templating vehicles, or is it just zmod having one of its "moments"?
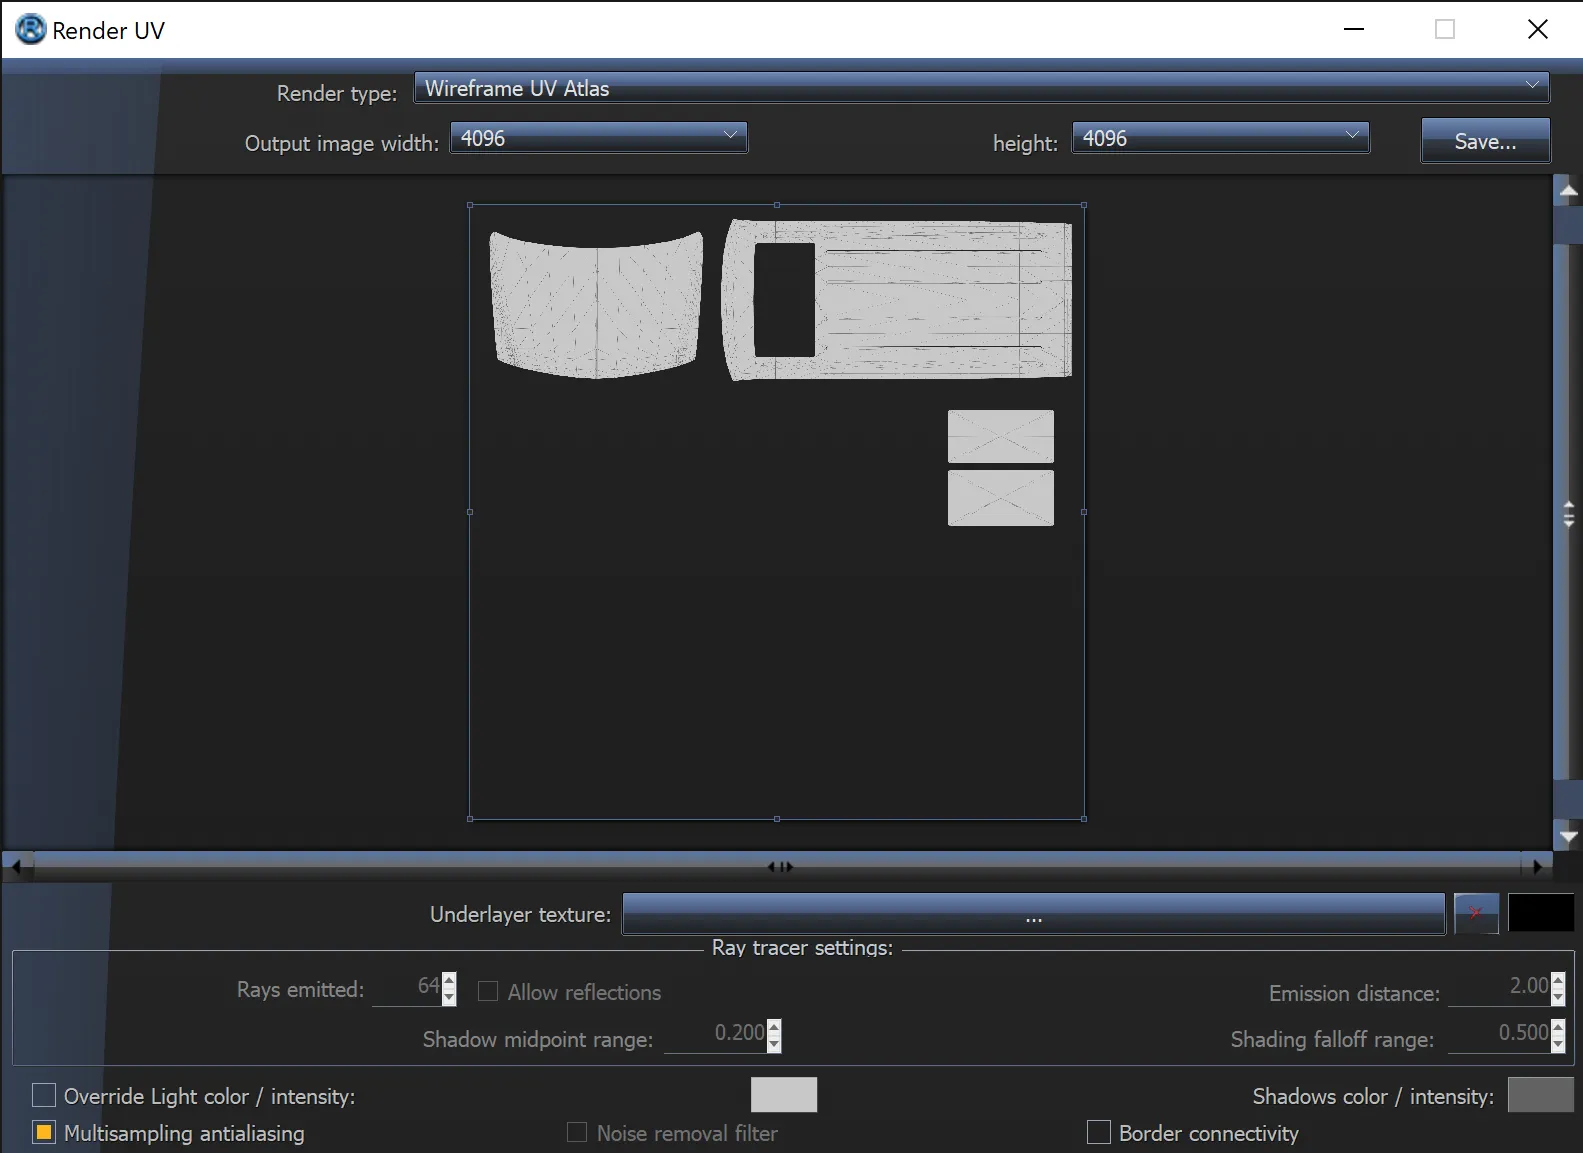
I'm also having a problem where the renderer doesn't load large parts of the template despite their objects being visible on the different viewports as well as on the UV mapper. They don't export with the template either. I literally don't know how to fix it, but sometimes it works for me to hide all objects and reshow them, although that isn't working as of right now.
I've attached some screenshots below. Any help at all would be appreciated.
This demonstrates the grayed out bumper issue:
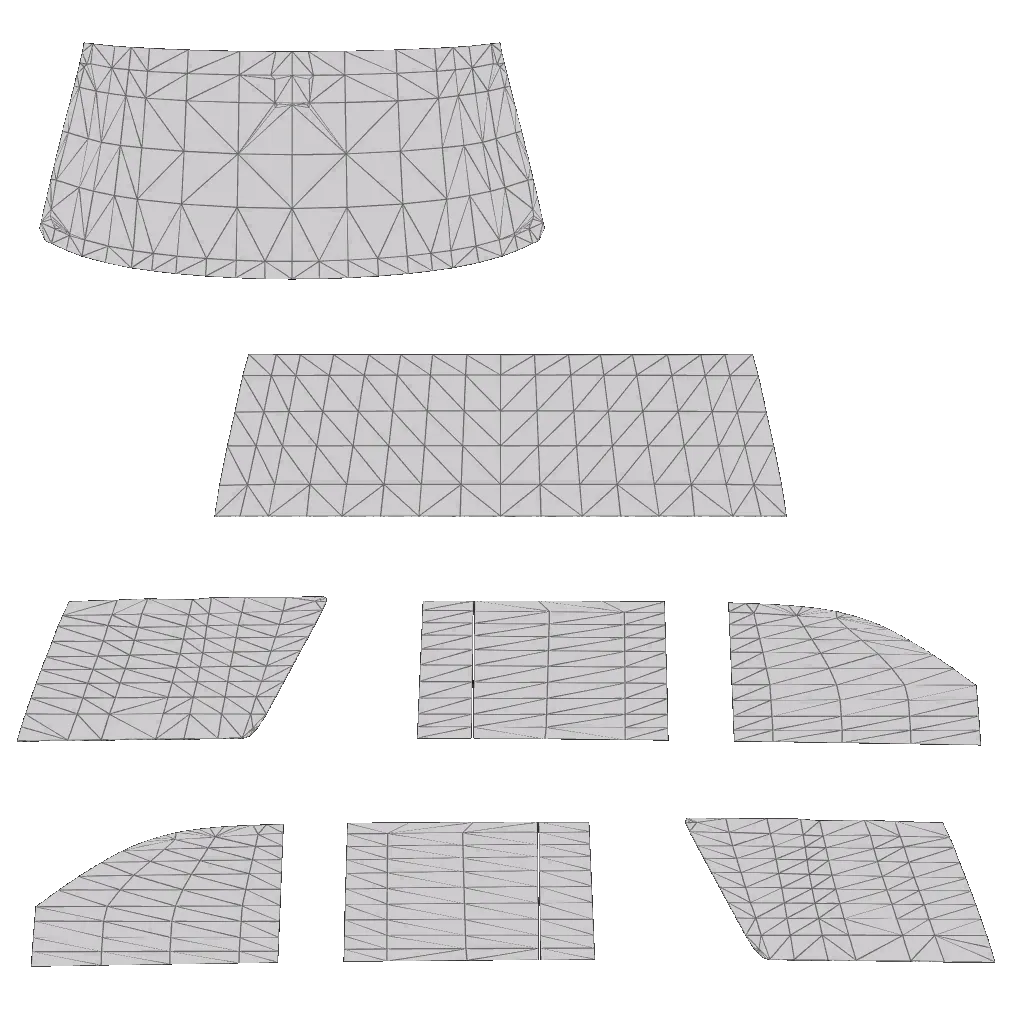
This demonstrates the missing parts issue:

Someone, a long time ago, told me that happens when you attach something that is too high poly. Not sure how correct it is, but that is the first thing that comes to memory.
Thanks for the response. I managed to get it fixed by reimporting the glass and keeping it uncompounded with no LODs but that's obviously not ideal. I'll try reducing the polys and see if that works.
So I'm working on this DHS pack and I'm running into some problems with the lightbar glass for some reason. I'm honestly not sure how to explain this one... So here are some videos demonstrating the problem.
zmod attach problem:
Weird behavior in-game (axes to world):
Weird behavior in-game (axes centered to object):
If you look closely at the second video, you can see that even when the vehicle is stationary the lightbar glass isn't properly positioned (modules are clipping through the top), even though it displays correctly in both OpenIV and zmod. When the vehicle starts moving, the glass literally starts spinning in a circle around the vehicle and comes to rest wherever it feels like. I attempted to rectify this issue in zmod by attaching the glass to the lightbar base but that doesn't work either. I also tried attaching the glass to the base in the original and unmodified file I downloaded from LSPDFR.com and the same issue happened. Repairing the car does nothing to change the position of the glass. I also tried centering the axes of the glass to the object, which resulted in the glass spinning around its original location. If you want a link to the z3d for testing or something let me know and I'll provide it via PM.
I don't really want to change the lightbar at this point so any assistance would be helpful.

I don't know what would need to be edited but i'm pretty sure it has something to do with the carcols.
I ended up changing the lightbar setup so that the broken rotator is used as a takedown. I'm going to keep this thread marked as unresolved in case someone else has carcols tips on adding an additional siren or something that I can do with the model.
So I was working on a vehicle to test out the rotator lightbar and I ran into a problem where the frontmost center rotator doesn't work or spin, it just flashes randomly above the lightbar. I tried changing the name from siren14 to siren9 to mimic the vanilla police rotators in case that caused the problem but that didn't fix it. Is this a problem with the model itself or do I need to edit something in carcols.ymt?
EDIT: I did center the problem siren's axes back to its object in case that caused it but that didn't fix it either
Videos:
So I made this slicktop Charger to go along with my MSP-based SAHP pack, but when I spawn the vehicle, the game crashes with that error. I have narrowed the problem down to the nFORCE rear bar, when I delete it, it spawns just fine. I cannot figure out what about that light module makes the game crash. I have noticed that in OpenIV, the actual individual light modules don't display properly and are white instead of the expected texture, even though the texture is present in the YTD.
Here is the z3d: *Link Removed*
Here is an image of the problem: